Sunday, April 26, 2020

Fabulous Balloons

Today's card makes me remember watching hot air balloons rise and sail over the downtown Edmonton sky.  I must say I'm partial to these styles of balloons rather than the character shapes they can have nowadays.  Would I like to ride in one?  I'm not sure; part of me says yes, part of me says no way.  However, they always look so peaceful sailing through the sky.

I've used the colours set out by the Fab Friday Challenge Blog...

Above the Clouds is one of the stamp sets that is going to be retiring at the end of May, along with its coordinating punch.  So, if you've had your eye on this set, now is the time to get it.

You can shop my on-line store  HERE and if you use the host code
 
DV6QGZ9E
 
you will get your name put in a draw to receive the host benefits.  You can also check out the Last Chance Items at the website.  Remember, so things are at a reduced price and everything is available only while supplies last.

That's it for today.
Thanks for dropping by.
Stay Home, Stay Safe
Joan


Friday, April 24, 2020

How Do I Use This? - Sponge Daubers

 This week's "How Do I Use This?" was all about sponge daubers.  A simple tool that most everyone knows how to use.  I was just hoping to give at least one new idea to people who tuned in the my Facebook Live on Wednesday.

For my first technique card, I sponged ink around the edges of the tag.  This is the most common way of using sponge daubers.  I layered two colours - Petal Pink and Flirty Flamingo.  The stamp set I used, Colorful Seasons, is going to be retiring at the end of May.

 The next technique was to sponge ink onto vellum.  I used Blackberry Bliss, which is a dark purple ink.  But by sponging it on vellum you end up with a lighter shade and the flowers coordinate with the ones on the DSP.  You do need to be careful to use circular motions when adding the ink...you don't want to end up with a "daub" on ink on your image.

Adding ink to a stamp was the third technique.  I sponged Old Olive onto the big tree from the Rooted in Nature set.  To create shading in the leaves I sponged some Mossy Meadow over top of the Old Olive.   I huffed on the stamp and then stamped on the cardstock.


 Colouring in an image is another way to use sponge daubers, although they are difficult for small spaces.  I began colouring this hibiscus by using Grapefruit Grove and colouring from the edges of the flower down toward the middle.  Next, I took Real Red and coloured from the centre of the flower out toward the edges.  I was trying to duplicate the flowers which were on the DSP.

 I used one of our Pattern Party Decorative Masks for my fifth technique.  I wasn't concerned about covering the whole piece of cardstock or with having some of the spaces darker/lighter than others.  It was just to provide a background for the flourish.  Flourishing Phrases is another stamp set, along with its' dies, that will be retiring this year.

Finally, I simply used the sponge dauber as a stamp itself.  I like how the sponge creates fuzzy little circles.

That's it for sharing today.  I'd love to have you join me on Wednesday nights at 7:00pm MT for "How do I Use This?".  I think once I end up running out of products to demonstrate, I will turn it into a technique class.  You can find me at JJ Creations on Facebook.

Hope you are surviving the wind in this spring weather.
Thanks for stopping by,
Joan

Thursday, April 23, 2020

Mystery Card Monday #3

 Wow, it's almost the end of the week and I haven't shared the cards I made on Monday for my Mystery Card Monday Facebook Live.  It must have been a busy week for the days to have passed so quickly.  But I can't recall what I was busy with.  Time can pass quickly in isolation.

Anyway - the recipe for this week's card is shown below.  I'm trying to use up DSP as we're coming to the end of the stamping catalogue.  The pieces I've used (on both cards) are from the same sheet.  I love how Stampin'Up! coordinates their papers.  I fussy cut the flowers out of a separate piece of Parisian Blossoms Specialty DSP, arranged them somewhat in a circle, and added rhinestones to the centre of each blossom.  Participants were to pick one-three focal images to put on the white square.

 This butterfly has sat on my desk for a week - since the vellum class I had last Wednesday.  I decided to find some DSP that it coordinated with and I wasn't disappointed with the Best Dressed DSP.

I actually have a third card that I used this recipe for, but I used it for my Wednesday "How Do I Use This?" class so I will share it tomorrow.


That's it for today.  I'm enjoying these Mystery Card Monday's and then seeing what other people create using the same recipe.  If you'd like to join me you can find me on Facebook at JJ Creations.

Thanks for stopping by
Stay Home, Stay Safe
Joan

Wednesday, April 22, 2020

Last Chance Products


WoooHooo!  Today the Retiring Products list came out. The easiest way to see what is retiring is to go to my website, click on "Shop Now" and then on "Last Chance". That way you can see each item rather than going from a list. If you want the list, let me know and I can get a PDF to you. 

Click HERE to get to my website

Don't forget to use the April Host code. When you shop AND use the code you will get your name put in a draw for a prize. April host code is DV6QGZ9E

Act quickly, some items will disappear fast and products on this list are only while supplies last.

Happy Shopping, Happy Stamping.
Joan

Sunday, April 19, 2020

Hope

 I had an extra piece of embossed vellum on my desktop and decided to use it for the background on this card for the Fab Friday Sketch Challenge.

The vellum is embossed with the Parisian Flourish 3D Embossing Folder.  I've used a piece of See a Silhouette DSP for the hexagon behind the cross.  I love how this paper is looks like a dark cloudy sky.  The cross is from the Cross of Hope Dies. I love its stained glass look.  Finally, I've added the greeting on another little hexagon and embellished it with two pearls that I've coloured with the Night of Navy Dark Stampin' Blends.  To get just the word Hope, I used a marker to colour in just that word before stamping.


Because tomorrow is Mystery Card Monday, I thought I would give you the recipe for tomorrow's card.  Simply cut out your choice of papers to coordinate together and join me on my facebook page tomorrow night at 7:00pm MT.  You can find me at JJ Creations.  We will create the card together, but you won't see what I'm doing, although I will give you some directions.  At the end people are invited to post their creation so everyone can see what has been created by using the same recipe by different people.  I also have a prize to give to someone who posts.
Here is tomorrow's recipe.


That is it for today.
I hope you are doing well and staying safe and sound.
Thanks for visiting.
Joan

Hold on to Hope - 151243 - $29.00

Parisian Flourish 3D Embossing Folder - 151474 - $14.00

Cross of Hope - 145654 - $37.00

Stitched Nested Labels - 149638 - $48.00

Friday, April 17, 2020

How to use - Vellum #3

 Today I've got a variety of cards for you to finish up this series. First - Colouring Vellum.  You can use any of our colouring products on vellum.  For the card above, I've used sponge daubers on the back of the Springtime Impessions piece.  Again, I prefer using bold colours so that they show through the opaqueness of the vellum.

Yesterday I showed you this card which I coloured using our Stampin' Write Markers.  For this butterfly I coloured on the front of the piece, being careful to stay inside the embossed lines.  If you wanted a softer look, you could colour on the backside of the vellum.

 We also have our Perennial Essence Vellum Cardstock available. I've used the Petal Pink Vellum for the poppies here and accented it with the Rococco Rose.  The package of coloured vellum cardstock comes in Old Olive, Petal Pink and So Saffron.

Perennial Essence Vellum Cardstock - 149101 - $15.00

 I don't have a lot of punches or dies right now that allows me to build flowers - but that is another thing you can do with Vellum Cardstock.  I've used the Perennial Flower Punch to build this first flower having embossed the Floral Essence image before punching it out.

 I also have the the two Daisy Punches so they are a quick way to build a flower on your creations.  I could have stamped the vellum with StazOn first with the Daisy Lane stamp set, but I liked the clean look of the petals for this card.

Finally - just stamp on the vellum.  I've used StazOn to ensure there is no ink smudging.

Well, that's it for today.  I hope I've given you some ideas or reminded you of a way to use vellum.  Don't hoard it - use it up and add something extra to your creations.

Stay Home - Stay Safe
Thanks for dropping in.
Joan

Vellum Cardstock - 101856 - $13.50

Thursday, April 16, 2020

How to use - Vellum #2 - Overlays

Today's tip for using Vellum is to use it as an overlay on either the whole card or on a feature element.  The card above uses a whole piece of vellum to cover up the Designer Series Paper.  The Peaceful Poppies DSP is perfect for this because of the bold design that can show through the opaqueness of the vellum.  Because the Snail shows through the vellum when you attach it to the DSP (or cardstock), I've added a strip of coordinating DSP to cover it up.

For this second project I've used a piece of vellum over top of the butterfly to tone down the Mango Melody cardstock.  It also gives the butterfly more dimension.  I've attached the vellum with glue dots and covered them up with a string of rhinestones. 

This may not be much of an overlay, but using the vellum as a label element is another way to use this product.  I've used the Stitched So Sweetly Dies because I love the way they coordinate together in their shapes and sizes.  I've punched a hole into the ends of the label to string a piece of the Petal Pink Metallic-Edge Ribbon through.

That's it for today - three ways to use vellum as an overlay.
I hope I've either reminded you of a technique or showed you a new way to use vellum.

Stay home - Stay Safe
Thanks for dropping by,
Joan


Wednesday, April 15, 2020

How to Use - Vellum #1

 Tonight I had a Facebook Live about all the ways you can use Vellum.  This post is going to centre on embossing vellum.

The card above has a piece of vellum that's been put through the Parisian Flourish 3D embossing folder.  You need to be careful with the piece once it's embossed because the depth of the embossing may make it tear.  To adhere the vellum piece to the Night of Navy cardstock, I used Tombow Glue.  Using a quarter piece of our Stamping sponges, I spread the Tombow over the cardstock making sure not to leave any "white" glue behind.  It all should be smoothed out.  Make sure that you don't get the glue too close to the edges of the cardstock either.  

The little flowers are a Sale-a-bration punch that I plan to keep because I like little flowers.  When adding them to a project, I generally spritz them with water and then scrunch them up.  Once I've unfolded them and let them dry, they create much more interest to a card than just plain flat flowers.  I have also scrunched up the little vellum flowers, just to give them some character.

 The next vellum technique was to use heat embossing.  I embossed the black outline of this butterfly from Beautiful Day.  Next I took our Stampin'Write Markers to colour in the sections.  I coloured on the front side of the butterfly.  If I had wanted a more subtle look, I could have coloured on the backside to end up with a paler shade.

You don't have to colour the vellum after it's been heat embossed.  These little poppies get their colour from the DSP that is behind them.

That's it for today.  I will share my other tips over the next couple of days so that each post isn't too long.

We're in for some warm weather coming up, so I'm hoping some of our snow piles will disappear!  Then we need a good rain to clean things up.

Hope you are keeping busy during these days of isolation.
Stay Home, Stay Safe
Thanks for visiting,
Joan

Tuesday, April 14, 2020

Mystery Card Monday #2

 Last night I had my second Mystery Card Monday Facebook Live over on my JJCreations Facebook page.  It was fun.  Although I couldn't figure out how to turn it off at the end so got some ceiling shots...duh!  I'm still a newbie to this whole venture.  But having fun with it for sure.  I'd love to have you join me if you haven't already.  Below is the "recipe" for last night's card.

The main idea for last night's card was to use a piece of Designer Series Paper where you liked both sides of the sheet.  We cut our piece and flipped over one piece so both sides of the DSP were showing on the card.  I like the little bird feet on the backside of my choice.


 Here is a fun kid's birthday card with the orientation of the pieces changed.

Finally, I had to make a card with the whole orientation of the card changed. So you can see that this "recipe" of pieces works both ways and it's a good one to keep in mind for using up DSP.

I hope you had a good Easter weekend.  Our family had a Facetime dinner.  My son and husband cooked the same meal and we delivered a plate over to our daughter's porch - so everyone at the same thing.  It was fun, although difficult being apart from one another.  I'm just blessed that I have both my grown kids close by in the same city.

That's it for now. It's suppose to be a sloppy "winter" day here today, so being indoors is a good thing.  I just wish the snow would melt instead!  Ah well, it is what it is.
Thanks for stopping by
Stay Home, Stay Safe
Joan

Saturday, April 11, 2020

How Do I Use This? Blender Pens

Today I'm sharing the cards I created on Wednesday's "How Do I Use This?" Facebook Live.
Blender Pens were the product of the day and I showed 5 different ways to use them.

For the Happy Spring card, above, I coloured in the sections of the duck using my Blender Pen and picking up ink from the lid of a Classic Stamp pad.  To get ink on the lid you simply squish the top and bottom of the ink pad together.  Then, use the Blender Pen to pick up the colour.  This is a great technique if you have ink pads but do not have markers.  The trick is to be sure you don't over over colour a section because it may cause the paper to pill.


I've posted this card before, but it is the one I used to show the second technique.  For this technique, stamp your image with Classic Ink and use the Blender Pen to pull the colour into the centre of the image.  I love how you end up getting a lighter shade without losing the original image.

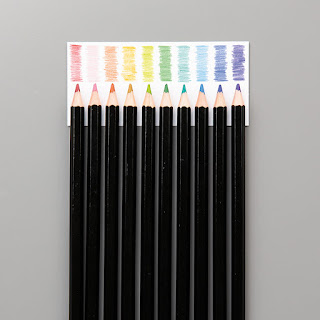
The third technique is to use the Blender Pens with our Watercolour Pencils.  We have two different assortments of colours you can purchase.  I used the Watercolour Pencils to colour in the image of the birds on the branch.  The leaves on the Designer Series Paper have been coloured in with a marker.


 For the fourth technique, I've used a Stampin' Write Marker to put ink onto a clear block.  This is just the same as the first technique except if you don't have stamp pads.  I could colour in the image with a regular marker, but I wouldn't get the paler shade of my colour.  And that's what the Blender Pens are all about.


The final technique is to use the Blender Pen to erase ink from a stamp pad.  First, ink up your stamp and then simply take the blender pen and brush off ink from where you want you image to be lighter.  I could have used a lighter shade of green in a different marker, but this way I've got a lighter shade of my Old Olive.  Be careful that you don't erase too much of the ink - unless you want to get rid of the words altogether.
This technique also works to erase a word and then recolour it with a different marker.


That's it for today.  If you'd like to view the Facebook Live video of me showing these techniques, you can HERE 
 I hope I've refreshed your memory about Blender Pens.  They get sort of forgotten now that we have our Stampin' Blends Markers.  Or, I hope I've given you a new technique to use.

Stay Home, Stay Safe.
Thanks for dropping by,
Joan

Friday, April 10, 2020

Welcome Little One


Today's card is zoo related for the challenge over at Paper Players this week.  I didn't have too many animals in my collection, but this kangaroo and koala fit the bill.

I used Stampin' Blends to colour in the animals.  The Garden Green strip and the big circle have both been embossed with the Layered Leaves 3D embossing folder.  Once I started with the circles I decided to keep going.

That's a quick post for today
Hope you are keeping safe this Easter Weekend.

Thanks for dropping by,
Joan

Animal Outing - 151281 - $29.00

Layered Leaves 3D Embossing Folder - 152321 - $12.25

Stitched Shapes - 145372 - $41.00