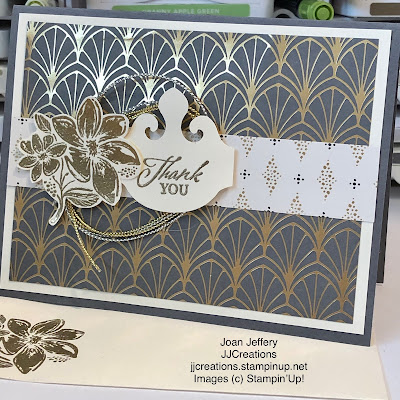
Today I pulled out a couple of pieces of the Simply Elegant Specialty DSP. I've combined Basic Gray/Silver and Gold which I don't think I've ever put together before. The flowers have been embossed in gold and fussy cut.
The new Elegant Tag punch is going to be quite versatile now that I've learned how to make different sizes of the tag and shapes. Here I've shortened the tag because the greeting was small and I wanted more of the gold and silver Simply Elegant Trim to show.
To make the tag longer you would do the same thing except with a desired length. The width of the tag is 1 3/4". Rather than putting the cardstock through the proper opening of the punch, turn it over and insert the cardstock through the bottom of the punch into the slits available....and punch
Turn the punch around and do the same thing for the other end. Here you can slide the cardstock to the length you are looking for. I didn't have anything in particular in mind when I was doing this, but I will use the tag on a future project.
Here I've shown the original size of the tag (in Calypso Coral) and the tag I just made.
Another option is to have the fancy design at both ends of the tag. Using various widths and lengths of cardstock you can create a number of different designed tags. I'll work on creating some and share them with you.
Finally, I always stamp the corner of my envelope and I've started to stamp the inside of my cards also. For this set I've embossed the flower in gold.
That's it for today. I still have a couple of stamps in this set to play with so I will probably share them tomorrow.
Thanks for stopping by,
Joan


No comments:
Post a Comment