Showing posts with label Non-Card Projects. Show all posts

Saturday, February 9, 2013

Busy Week

Wow - it has been a very busy, productive, fantastic week - sorry I didn't get anything posted between last Sunday and now.  I was frantically prepping to get ready for the North Central Teachers' Convention this past Thursday and Friday.
Wednesday night I had finally gotten everything created, and packed and used my toboggan to help haul everything to the car in one-fell-swoop.  (Toboggans are wonderful things)  Sorry the photo is blurry!
Wednesday afternoon was spent setting up the booth... I had created this banner Monday and Tuesday....it says  "We can go way beyond just cards!".....'cause we can!

I'm happy to say that I got rid of a lot of my retired stamp sets, and quite a number of my cards got sold also!  I had tons of teacher's coming by and it was fantastic to see old friends I hadn't seen in a while, and current colleagues that I don't get to see very often.  It was fun working with Colette and Allison in the booth too.
Wednesday evening I snapped the view out of the hotel window - I love reflections in buildings!
Thursday and....
Friday were beautiful mornings!  
I had a fantastic time, and today I'm working on some creative deadlines, unpacking and cleaning, and then gearing up for the next event - this Friday!

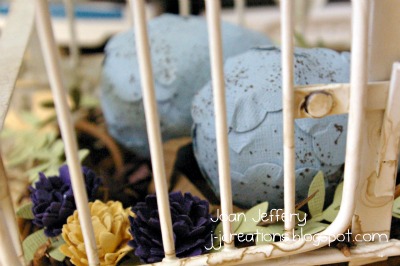
To leave you with something creative - this is an 8X8 piece that I created pretty much exactly from the tutorial from the "Spring Edition 2013" from Create with Connie and Mary.  I used different paper for the bird, and the stamps I added are different, but everything else is the same.  The instructions were wonderful and I got lots of compliments on it at Convention.  I thank Connie, Mary and the rest of their Design Team for the inspiration they provide in their Tutorials.

Off to get more things crossed off my "To Do" list.  Thanks for stopping by - Have a Great Day.
Joan


Friday, November 16, 2012

Christmas Placemats


Today I'm sharing a project I completed in the MDS class I'm taking with Heather Summers and Martha Inchley.  One of the assignments was to create placemats.  It's so easy to do now that we can customize the dimension of our projects.  Each of my placemats is 11X17 and I'll be sending them off to Staples to be printed.  I'll then get them lamented and we'll be ready for December dinners.
It will cost about $0.89 to print each one so I can design a whole new batch next year....or tweak and reprint these ones.
The world of possibilities with MDS just keeps getting bigger.


Don't forget to check out the new challenge blog on Monday
We'll have a great sketch to start things off with.

ALSO ON MONDAY......
BEGINS!  
You're not going to want to miss out on this fabulous sale from November 19-28, 2012.
It's the biggest on-line sale of the year with savings up to 50%.

It's the most wonderful time of the year......
Hope you're having a great day.
Thanks for stopping by.
Joan


Wednesday, November 7, 2012

Gift-a-Palooza coming up....

I'm hosting a Gift-a-Palooza on
November 30, 2012

Begin dropping in at 3:00 to end the evening at 8:00pm

You pick only the  project kits you want to create to meet your gift giving needs of the season.  You can order more than one of any project kit.

PRE-REGISTRATION IS MANDATORY - so your projects will be prepared and ready for you to work on when you arrive - or to stamp and take home to work on at your leisure.


Christmas Memories Flip Album - opens up to provide 7 sections for photos/journaling memories
$7.50 each

Gift Card Holder - Belly Band slides off to open where a pocket with a pull-out tab is available to attach your gift card to.
$2.50 each

Stocking Stuffer - good for holding thin chocolate bars, gift certificates or Hot Chocolate Packages
$3.50 each

Festive Gift Bag
$5.50 each

To my out of town stampers - I will package up your "kits" and put them in the mail.  Postage will be determined on an individual basis.

Tis the season to be crafting....
Thanks for stopping by
Joan

Friday, October 12, 2012

Playing with Crayons

I finally got around to creating a crayon picture using our Stampin'Up! fabrics and ribbons.

I've been eyeing all those fabulous crayon creations on Pinterest and this weekend I took a deep breath and tried it out.  I learned some lessons and have got ideas for other pictures now.

I delved into my can of uncovered crayons that I had left over from my classroom - therefore I didn't know what the brands of all the crayons were - and believe me, some brands react differently than others to the heat gun!  So - I'm not completely happy with this first attempt - but the little white flowers  amongst the gobs of solid wax help it out.

I used spray starch to moisten and help me "distress" the fabric a bit - it hasn't made it too stiff - it just helped wrinkle it a bit.  We all know I have an aversion to flat paper - apparently, for artistic purposes, the same holds true for fabric.

Take the plunge - try something new today.
Thanks for stopping by.
Joan

Monday, August 6, 2012

Cards, Scrapbooks and Guest Books...

Look Out....There's lots to look at today!

First - Here is my card for the Merry Monday Challenge - It's straight forward enough that I think I'm going to use as one of the designs for my Christmas in August.  I'm very happy to have happened across this challenge - although I've known Lesley for a while now.  It's helping me plan ahead better!  
I love two step stamping and used watercolour paper with this image.

Now - here are the scrapbook pages that I've created as I follow Lyssa Griffin Zwalonek's "31 Pages in 31 Days...trying to get some paper scrapping done in the midst of all the MDS scrapping. I worked on a number of them yesterday to get caught up - please excuse the cement background - I found the sunlight a lot better to photograph in yesterday than my basement.

Day 2 - Allison groaned when she saw this, but I like this photo.

Day 3 - a double spread.  I copied Lyssa's leaves exactly, but my arrangement of photos is different.  I wanted to use a bunch of the photos my Mother has taken over the years.  I miss the autumn colours of the east!

Day 4 - This sketch centred around the "page element" which was created....the Two Tags with the heading on them.  I created the tags the same way, but changed up the papers for the flower and the page arrangement is different too.  I loved the idea of all the little bits of paper along the edge - great way to use up little pieces - however I did go looking for words that worked with the subject matter.

Day 5 - By the time I started working on this sketch I decided that I needed to go get some more of my pictures copied and enlarged.  The only one I had that I thought I could work with on this sketch was of me in the early 60's.  I've also discovered that my camera now has two little specks on the lens that I can't get off....hmmmm must look into that.

Finally - I'm sharing a book that I was asked to create for a co-worker who is getting married this month and needed a guest book.  I based the cover on her invitation, and actually cut out the names from her invitation so that things co-ordinated.  On the inside I took the "Everything Eleanor" swirl and stamped the top and bottom (alternately) of each page just to add a bit of colour on the inside of the book.

That's it for right now - I'm waiting for some Crystal Effects to dry for today's scrapbook sketch - so I may post that page later this evening....and yes - it may take that long for the Crystal Effects to dry.

Hope you are enjoying your summer day - and the last of the long weekend.  Thanks for stopping by to take a peak.
Joan


Wednesday, August 1, 2012

Season of Sweets and Beyond


This week's challenge over at Hand Stamped Sentiments is "Anything But a Card"...and while my last project is a card, the rest of the projects are not.  My goal today was to use some of the new products from the Holiday Catalogue.  I was reminded at Convention, by Bonnie Thurber, to show ideas to do with various products outside of what they are "suppose" to be used for.

All of my projects are based on the little envelopes included in the Season of Sweets Designer Kit.  For the project shown above, I used the envelope as a little frame, tucking Elliot's picture inside and decorating the outside.  

To ensure the "frame" stays standing, I added an "anchor" using the Modern Label punch.

Next, I created a scrapbook page using the envelope as a frame again, but adhering it to the page.  (That's Elliot's father, Grant, at his second Christmas.)  I stamped snowflakes from Snowflake Soiree, and used the Snow Flurry  Big Shot die to create the snowflakes with Very Vanilla Cardstock and the Champagne Glimmer Paper.

Finally, I used the envelope as the base of a card.  I covered the inside with card stock and created a belly band to keep it shut using a strip of the die cut elements from the Design Kit; including the little holly leaves and berries.  The berries are covered with Cherry Cobbler Dazzling Details to add a bit of bling.


I'm on a roll here - so I'm off to play some more.  Thanks for stopping to visit.
Joan

Thursday, June 28, 2012

Congratulations Keys


It's that time of year when lots of congratulations are in order - retirements, new postings - whatever.  I've used the Freshly Made Sketch for this creation combining an embossed piece with some DSP from Fan Fair.  I do love old keys - wish I could remember where I put the small stash of left over trinket keys that I had.  Probably in a safe place.....???

Tuesday night we had a retirement gathering for our principal.  At the last minute the organizer called me to ask if I had something that could be used as a guest book....I found the book below that I had made a year or so ago.  The "Define your Life" did not really go - so I quickly revamped things as you can see in the second photo.  Thank goodness for sticky strip - that little label is NOT coming off!


Grant and family got home safely today.  They did have to stay in the mountains an extra night due to the flooding - but everyone is home safe and sound now.  Yay!

Only one more wake up with kids....
Hope your day is full of things to look forward to!
Thanks for stopping by.
Joan

Wednesday, June 27, 2012

Happiness Quilt


The days of making quilts are gone for me - but it's fun putting paper ones together....Quilts was the challenge over at Hand Stamped Sentiments.  I've used the Floral Districts DSP for the flowers in the middle of each square.  The squares were mounted on white card stock before being cut with the Top Note Die and then embossed with the Fancy Fan Folder.  I'm not sure about the two random strips of ribbon - but that's where I went.  

I also finished off a  Mini Album using the Serene Silhouette set.  I used a tutorial from the 2012-13 New Catalogue Edition from Create with Connie and Mary.  I had to make a few adjustments because I didn't have everything that was used in the tutorial.

My cover is pretty much the same.  I didn't have a coiling machine so I used ribbons to join all the pages together.

I don't have the English Ivy Simple Sentiments stationary - so I used the flourish from Creative Elements on Very Vanilla card stock  for the pieces that used the stationary.

Of course, since I didn't have the stationary - I didn't have the envelopes with the fancy insides or the fancy edges.  So, I "cut" off the envelope glue off a regular Vanilla envelope using one of the Adorning Accents Edgelits.


I also chose to use the Finishing Touches Edgelit for some of the parts instead of the scallop border punch.

I like the final results.....now I just have to decide who to give it to.  I must commend this group of women who create things for the tutorials.  The steps are always straight forward and easy to follow.  And they are such an inspiration!

Hope you are finding inspiration in your life today.  Thanks for stopping by.  Only three days left of school....whooooohooooo!!!!!
Joan

Saturday, March 31, 2012

Spring is in the Air


As soon as I saw the challenge at Stampin' Royalty - "Spring Things", I knew I had to get busy with the project I had planned.....I was inspired by the photo on page 5 of the April Stampin' Success Magazine. 

 I have put this bird cage at our front door for the past two years.  Sometimes it's empty; last year I stuck a chickadee inside (ceramic of course).  When I saw the example in the magazine I knew I had to duplicate it.  I literally had to cram in  the wreath I used as a nest, and the eggs are drastically oversized, but I'm happy with how it turned out.

I've been using pearls or rhinestones as the bodies of my butterflies, but I like the added flowers too.  Linen thread was used of the antennae....it worked well.

The styrofoam eggs are covered with layers of the Blossom Bouquet Triple flower and then spritzed with Soft Suede.  I moistened the paper a bit to make it more pliable, and attached the layers with a hot glue gun.

These little flowers are standard....the Boho Blossoms punch - largest blossom in 5 layers.  Each layer was spritzed with water first before crumpling it up.  I used sewing pins through the middle to hold them together.

Finally, I used the left over butterflies for a card using the sketch from Stamping 411.

I've been babysitting Elliot the past three afternoons while his mom and dad get moved into their new place.  I'm bushed!  But I had a good time.

Hope your weekend is off to a good start.  Thanks for taking the time to visit.
Joan

Friday, February 8, 2008

Valentine's Day is coming up quickly

Don't forget that Valentine's Day is coming up this week....we did these cute little packages in January. You can create these to give to friends, family, students, etc. Don't forget the glitter....it just glitzes it up.