Monday, May 14, 2018

You CAN judge a book by it's Cover!

 In my opinion......this is the prettiest Stampin'Up! cover that we have had in the 13 years that I have been a demonstrator.  I love all the bright colours  and especially love how the images almost pop off the cover because of the shadows.  It's wonderful.
And, I can tell you, in all confidence, the inside images are just as fantastic.  What a lot of wonderful product.  I'm actually surprised that I'd forgotten to show you both the cover and the projects we completed at On Stage in early April.  Sheesh!
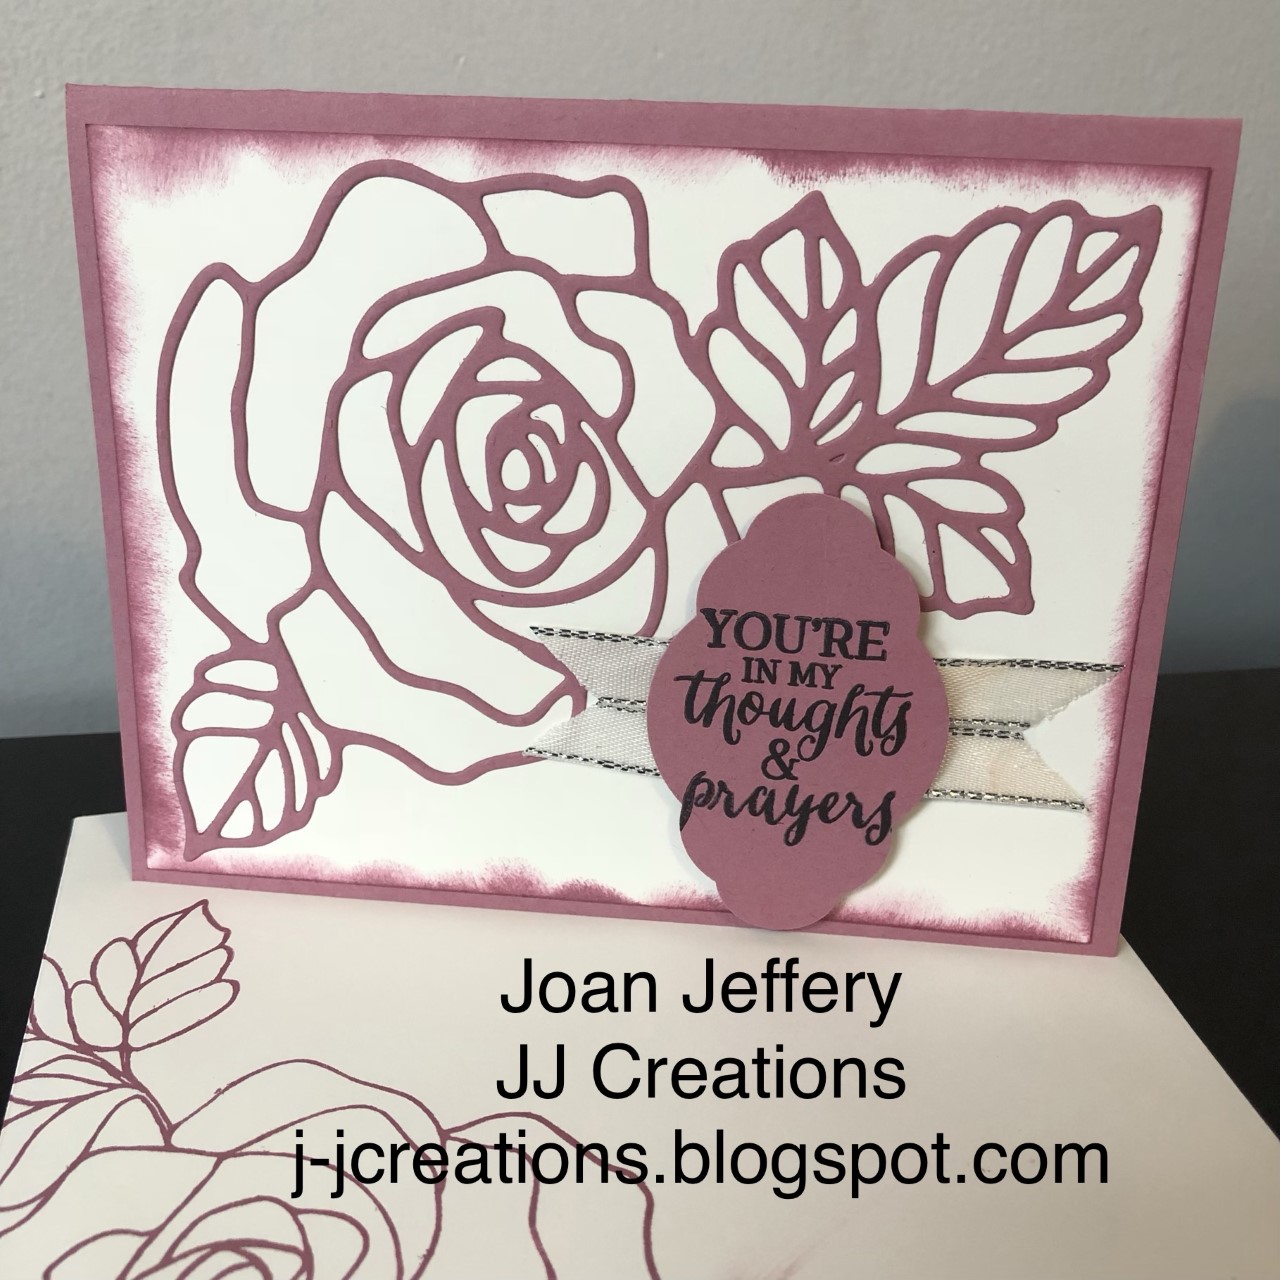
 Here is a product that I think is going to be a favorite.  This particular piece of die cut cardstock helps create a wonderfully delicate card.

Vellum is going to be a special favorite this next year too.  This piece is nice, although I wish I'd had one extra colour to use,.....but the other pieces in this package are beautiful.

I have a couple of friends who are going to be grabbing up this new tree set. Stampin'Up! has designed this new set to coordinate with Lovely as a Tree.  I also love this colour combination and the embellishments.

That's it for sneak peeks today.  I get to start opening boxes and using new products now that my May classes are planned out.

Thanks for dropping in.
Hope you have a wonderful day.
Joan

Saturday, May 12, 2018

All that Glimmers.....

 All that glimmers is not gold - sometimes it's turquoise or green.  I'm going to miss this set of Myths and Magic Glimmer paper.  It sparkles so much, it's amazing.

I'm still using up retiring products and stamp sets for my workshops in May.  These little butterfly from the "Bold Butterfly" framelit set are a great way to use up scraps!

 To be honest, I just inked up this "In the Trees" stamp set.  I love the little "we need to hang out more" sentiment.  The tree's leaves get a soft look by using sponge daubers to add the ink to them.  I coloured in the tree trunk using Chocolate Chip ink and a blender pen.

I'm going to miss this little flower punch.  I like making scrunched up flowers with it.....although some of my stampers get a bit scared when I scrunch up the flowers after punching them.  I wet them first in order to break down the fibers a bit so they scrunch easily.

If you are currently subscribed to Paper Pumpkin you're in for a surprise in June.  The June Pumpkin is going to coordinate with one of the product suites in the new catalogue.  They aren't revealing which suite yet - but you'll either have in your hands, or have access to the new catalogue, on June so you can take a look at the options.  Extra products to coordinate with a Pumpkin - too much fun!!!
So - if you don't have a Paper Pumpkin Subscription, now is the time to subscribe.  As long as you subscribe before June 10 you will receive the Show Stopping Pumpkin.
HERE is the link to begin your subscription.

Finally, a quick share.  Last Sunday, my Grandson had his first piano recital.  We were so proud of him, and he looks so grown up.  The time is flying and he's growing up fast.


That's it for today.
Have a wondeful weekend and thanks for stopping by.
Joan


Wednesday, May 9, 2018

Working with Old so there's room for the New

I'm still creating for workshops this month; using products that are retiring at the end of May.  I'm working with stamp sets, cardstock and DSP that are retiring.  

The above card uses the plainer side of the Naturally Eclectic DSP.  It sure helps the black to pop.  I'm going to miss the watercolour words.  I have used them a lot because of their sentiments and the font.

I was introduced to this, Rose Wonder,  retiring set sort of late in the game.  I will be keeping ahold of it though because of it's  sentiments, and the die cut roses can look quite different depending on the colours used.
Everything in this card will be remaining in the upcoming catalogue.  I love these little bees, especially the fuzzy stamped image.

All of these cards will be created at the May Stamp Club Class.

May 15, 2018
6:30-8:30pm
My House
Cost $15   Club Members $10

Register HERE to join the fun.

The following are a couple of cards featuring images from stamp sets which will be available in the  new upcoming Annual Catalogue.  I love the little Rhino!


Hope you have a wondeful day.
Thanks for stopping by.
Joan


Monday, May 7, 2018

Variations with Vellum

Happy Monday - I do hope it's magical.
I put together these three cards for my upcoming Varations in Vellum workshop. Vellum is a wonderful paper type that can add a little something different to your cards no matter what the theme may be.  
In the Mermaid card, I used one of our embossing folders and embossed the vellum with the "Seaside" impression.  You DO need to be very gentle when taking it off the embossing folder, because it will tear.  My happy mistake is that I like the torn look for the edges of the sea foam, and I followed that idea through with the embossed cardstock.  To add a bit more dimension, I inked up the embossing folder (on the labeled side) with some Island Indigo Ink.....which is one of our retiring inks.

This card demonstrates the standard use of vellum...using a strip on the card to add an opaque window. I am so happy that this Petal Palette stamp set, from the Occasions Catalogue, is going to be included in the 2018-19 Annual Catalogue.  I will miss this DSP though!
The floral image is stamped on black with the White Craft Ink.

Finally, heat embossing on vellum.  I had the intention of colouring in the vellum with Blends/Markers, but these flowers looked better on this DSP without the colour added.  The Remarkable You stamp set is retiring at the end of this month.

You can create all of these cards by attending my Variations with Vellum Class

Thursday, May 17
6:30 - 8:30pm
at my home
Cost - $15.00 ($10.00 if you are a club member)

You can register for the class  HERE

That's it for this morning.  I hope you have a wonderful day.  
Thanks for stopping by.
Joan


Saturday, May 5, 2018

Ahoy Paper Pumpkin

Today I put together my April Paper Pumpkin.  The kit included 5 sets of cards to put into four little boxes.  I shown the different cards and the little box wrapped in Crumb Cake Baker's Twine.  There were a number of different greetings, but I liked the "Adventure Awaits".  I think this is an awesome little set, but it's hard to think ocean when you're in the middle of Canada.

I kept on little set of cards aside and will be incorporating them into a regular side card.  So stay tuned for that.

Classes coming up......

 Coffee and Cards Class - May 8
You can register  HERE
And, you can get the details HERE

Stamp Club - May 15
Register HERE
Stay Tuned for project samples  

Variations in Vellum - May 17
 Register HERE
Stayed Tuned for project samples

That's it for today.  I spent most of today catching up on art projects.  More stamping tomorrow.

Thanks for dropping by,
Joan


Friday, May 4, 2018

Halt Hording - Specialty Designer Series Paper.

 As crafters, I'm sure, we are all guilty of keeping some sort of product that we don't want to use because it's so  pretty/special/expensive/no longer available.  We keep it so we don't run out, and then we end up have way too much in our home.  This could be anything from fabric, wool, embroidery thread, stamps, embellishments or paper.  I am guilty of keeping an abundance of these particular items over my lifetime. The wool and fabric are gone, although their associated tools are still kept - just in case. Some of our Stampin'Up! Designer Series Paper, over the years, has been so wonderful that I have kept it; thinking I'd use it later.  Have I used it - nope.

This season, I'm changing that.  Well, in a small way.  I've found a wonderful way to use up the sheets of our Specialty DSP, which is thicker than the usual paper.  I got this idea from Ronda Wade.

For these particular cards, I'm using the Myths and Magic Specialty DSP.  It will be retiring at the end of May.  I've used co-ordinating cardstock and a variety of embellishments.

To begin, cut and fold your card base in a colour that co-ordinates with your DSP. Open up the base and trim 3 1/4" off ONE side.

Attach a neutral piece of cardstock cut 1/2 x 5 1/2".  Attach to the edge of the front of the card.

I add adhesive to the underside of my neutral piece (black) and then stand the card on it's side, with your DSP to be sure that the edges are matching.

Fold down the "flap", to secure, and you're done with the base.

You now have a fancy front, and a fancy inside.


Carry on to embellish the front as you like.  Here are some more samples using half of the choices of this  particulary Specialty DSP.


Finally, don't forget to decorate your envelope with scraps.

Put adhesive on the outside of the envelope flap.

Attach your piece of DSP.

Cut off the excess paper.

You now have an envelope that matches either the inside or the outside of your card.

That's it for now.  It's now your turn to dive into your scrapbook paper box, drawer, closet - and use some of the thicker favorites up.  People will love you for it because you've sent  them a handmade card, happy mail, for no other reason, perhaps,  than to say "Hello".

Thanks for dropping by
Joan


Coffee and Cards

 Howdy - It seems like I haven't been creating lately, but I have.  I'm sharing two cards with you which I will be featuring at my Coffee and Cards on Tuesday......

Tuesday May, 8, 2018
My House - 9505 - 86 Street, Fort Saskatchewan, AB
9:00-11:00am
$6.00 for two cards
$12.00 for four cards

Regsister HERE for Coffee & Cards

The first card is a CASE from a swap card I received from Nicole Zandbergen at the On Stage in Red Deer last month.  I really liked how she popped up the whole mat with dimensionals and punched a hole to stamp into and created a shadowed sort of look.
I used Guy Greetings, which is retiring at the end of May, because I needed a couple masculine birthday cards for this month.  I am going to miss this set a bit because I like the vintage images.
To begin, I attached the mat to the base with a very small "tick" of adhesive.  Then I did the stamping with the various colours and stamps, being sure to slide a scrap piece of paper under the mat so that I did not stamp onto the base of the card.  REMEMBER when you stamp into the circle, but are protecting the base, be sure the scrap doesn't fall into the hole - you'll lose your image.
To raise the whole mat I used the Foam Adhesive Strips - they curve around circlular shapes lickity-split.  The other adhesive I used was our Tear & Tape to keep the ribbon close to the card.

This second card is also a case from the swap - from Ashley Fifer.  I think this is a fantastic way to get rid of little scraps of DSP, as well as using up scraps of cardstock.  Adding embossing is a bonus.

If you are in my area, I would love to stamp with you on Tuesday.  
That's it for now.

Thanks for stopping by
Joan